Pink Fire Pointer September 2011

How to Make Your Hair Grow Faster???

The hair is one of the few things that we girls are in continuous conflict. Yes, it's too harsh, too fat, too thin or have too much volume.

There's no scientifically proven way to make your hair grow faster. But, there is a lot of research on what causes hair loss. And the less hair you lose, the more hair you have growing to your length of choice, right? While some of the causes of hair loss can't be helped, there are several things you can do to encourage your hair to grow to its full potential.

Steps

  1. Keep your hair in excellent condition.
    Keep your hair in excellent condition.
     
    Keep your hair in excellent condition. Seeing a hairdresser regularly to have your hair cut and styled will keep it in top condition. Hair in good condition gives the impression it's longer even if it's not because it looks good and has no split ends, etc.

    • Use a quality brush to keep your hair brushed, such as a boar bristle brush. Tilt your head forward and brush with your head upside down to bring the oils to the ends of your hair and stimulate the scalp.
    • Keep your hair well moisturized. You don't need to use commercial product but you do need to know what you can use to condition your hair properly if you resort to natural items.
    • Don't wash your hair every day; allow the hair oils to condition your hair rather than constantly washing the oils out.
    • Massage your scalp while washing your hair. Massaging your scalp can help your hair grow faster and longer as it increases the blood flow in your scalp.
  2. Be kind to your hair.
    Be kind to your hair.
     
    Be kind to your hair. Your hair falls out on its own (approximately 70 to 150 hairs daily), but you may be pulling it out faster as a result of the things you do to it. The gentler you are with your hair, the less chances it has to fall out excessively. Some things to keep in mind include:
    • Don't put your hair into tight ponytails or cornrows. Use butterfly clips and loose braids instead.
    • Brush your hair carefully. If you have wavy or curly hair, there are probably times when you encounter resistance as you're brushing. Right before brushing, use your fingers to gently comb through your hair. And when you brush, start at the ends, and hold the strand you're brushing with your other hand so that if you pull on the hair with a brush, you're not pulling on the root (pull from the grip of your hand instead).
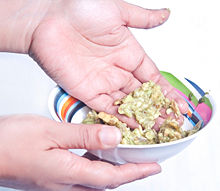
    • Brush your hair before you shower in the morning. Throughout the night your hair can knot up a lot. Brushing your hair before you shower reduces tangling when washing it in the shower. When using conditioner, try sifting your fingers through your hair. This reduces extensive combing after your shower and helps to distribute the conditioner evenly.1 day a week put on a good conditioner,hair mascara or a home made conditioner for your hair that could be made of avocado,eggs,oils for 20 mints or 15 and try to not use hair sprays.
    • Minimize tangles in other situations, such as on windy days, by containing your hair with buns, braids, hats, etc.
    • Minimize how much you style your hair. Any kind of styling that involves pulling your hair at the root (blow drying, using a straight iron or acurling iron, or using rollers) can contribute to hair loss.Heat styling also can encourage hair to break. If you really need to dry your hair fast, use a blow dryer for 5 minutes only.
    • Avoid overly long or elaborate extensions or tight hairstyles that tug your natural hair. Pull on it or pull it out too many times and it won't come back.
    • Avoid or minimize harsh treatments like dyes, tints, bleaches, straighteners, and permanent waves. These weaken your hair and increase the likelihood of breakage and loss.
    • Minimize or stop using heating items on your hair.
  3. Maintain good nutrition.
    Maintain good nutrition.
     
    Maintain good nutrition. Your body needs several building blocks in order to produce a healthy head of hair. In particular, you'll need enough protein and vitamins, and you can easily meet your body's requirement by eating a balanced, nutritious diet, or by taking a multivitamin and protein or other appropriate macronutrient supplements consistently if you can't eat well due to illness or otherwise. Keep in mind, however, that it can take several months to notice the results, so don't get discouraged.
    • Research suggests that iron deficiency makes hair loss worse. Women with heavy periods are at a higher risk of iron deficiency. However, unless you have an iron deficiency diagnosed by a doctor, you shouldn't take iron supplements. They can upset your stomach and cause severe constipation, and iron overload can be dangerous. Taking a multivitamin and eating iron-rich foods (tofu, lentils, beans, oysters, spinach, prunes, raisins, lean beef) is more than enough. 
    • If you're a vegetarian, eat foods rich in Vitamin C whenever you eat iron-rich veggies. Vitamin C will help your body absorb the kind of iron that is found in vegetables.
    • Avoid purchasing unnecessary supplements such as biotin. Despite the many claims that biotin promotes hair growth, no studies have shown this to be the case. However, hair loss is a sign of severe biotin deficiency; in these cases, the hair loss will be accompanied by a scaly rash around the nose, mouth and genitals.
  4. Avoid dramatic weight loss.
    Avoid dramatic weight loss.
     
    Avoid dramatic weight loss. As you shed pounds, you may also shed hair. The dramatic changes that your body undergoes when it loses weight quickly (the change in nutrients, the stress involved) can cause your hair to thin. Diets low in protein and iron (for example, very low-fat diets) and also those high in protein but low in fruits and vegetables (for example, Atkins) that result in dramatic weight loss can also trigger significant hair loss. Instead, keep a balanced diet, and focus on gradual calorie reduction (one or two pounds a week).

    • Each hair on your head grows for 2-5 years, slows down for about six weeks, and rests for 3-5 months before falling out so a new hair can grow in its place. Normally, 15 percent of your hair is at the resting phase, but a sudden change in nutrition can cause some hair follicles in the growing phase to switch into the resting phase prematurely, possibly raising the percentage to more than 30 percent.
  5. Relax.
    Relax.
     
    Relax. Stress is a common cause of reversible hair loss.When you experience physical or emotional turmoil, it can take anywhere from three weeks to four months for the results to show up in your hair. It is important to relieve your stress.
  6. Address any pressing health issues.
    Address any pressing health issues.
     
    Address any pressing health issues. Hair is a strong indicator of overall health. Many nutritional deficiencies can cause hair growth to slow, and can cause hair to thin. Hormonal problems such as hypothyroidism and PCOS can also cause thinning. If your hair has gotten seriously thinner, or stops growing for more than a few months, discuss it with your doctor as soon as possible.

 Source: wikihow.com

How to Stop Hair Loss Naturally!!!

Using natural products to help prevent hair loss is cheaper than trying to replace lost hair once it's already gone. Consider the power of these natural ingredients to stave off thinning hair:
No hair loss treatment is complete without addressing the scalp.

Steps

  1. Treat with saw palmetto: This herb is sometimes used to treat enlargement of the prostate. This is because Saw Palmetto blocks the production of DHT (a metabolite of testosterone), a contributing factor to enlarging of the prostate. Because DHT production also causes hair loss, Saw Palmetto has been shown in some small studies to be effective for preventing hair loss in some men. It was first used by the American Indians to treat and maintain healthy hair and skin.
  2. Try nettle root: Those little plants with the big sting are good for something after all. Nettle root is another treatment which blocks the production of chemicals which enlarge the prostate. They are the same ones that can cause hair loss.
    • Evidence suggests that nettle root may not only stave off baldness, but may actually regenerate hair growth.
  3. Use vitamins: Your mother told you they were good for you, but you may not know they're good for your hair too. Vitamin A is an anti-oxidant which promotes healthy production of sebum in the scalp.
    • Vitamin E stimulates circulation. Good blood circulation in the scalp is important in keeping hair follicles productive. The 'B' vitamins contribute to melanin, which gives hair its healthy color and also stimulates blood circulation.
  4. Massage scalp to stimulate circulation. As already noted, good circulation in the scalp keeps hair follicles active. Massage by hand for a few minutes of daily scalp stimulation. Circulation may be improved through massage by using a few drops of lavender or bay essential oil in an almond or sesame oil base.
  5. Restore moisture through hot oil treatments. You can use any natural oil — for example, safflower, canola, olive. Heat it up so that it is "warm but not too hot". The important thing is to massage it into your scalp, then put on a shower cap for about an hour, then rinse or shampoo out the oil. Mayonnaise works as a conditioner. Slather your hair with a generous dollop, put on a shower cap for up to an hour.
  6. Try rubbing your scalp with garlic juice, onion juice or ginger juice -- you can use one out of three; do not mix any two or three. Leave it on over night (if your head gets wet you will be able to smell it). Wash it out in the morning.
  7. Try rubbing your hair with rangoli henna.
  8. Practice meditation. Most of the times, the root cause for hair loss is stress. Meditation can help in reducing that and restore hormonal balance.
  9. Apply warm green tea (two bags brewed in one cup of water) which contains antioxidants and can prevent hair loss and help hair growth. Leave on for one hour and rinse.

How to Get Rid of Black Circles Under Your Eyes...

Bags under the eyes. Makes you look so tired, junky, and the worst Old. I hate them. I can not get rid of them. I think only after 12 hours of sleep per day without cigarettes and without computer my eyes will look bettter.
Dark circles under the eyes tend to age us more than wrinkles or grey hair. Discoloration of the under-eye skin affects many of us from time to time. For others, the dark circles can persist as a long-term feature, sometimes as a result of an illness, but often as a result of allergies, inadequate sleep, and even heredity. Whatever the cause, you can still minimize the appearance of dark circles under your eyes; in some cases, you'll even be able to remove the circles completely. Try out some of the cures offered below, to find your favorite. 


1. Assess the cause of your black circles before attempting to remedy them. If you need to seek treatment for an underlying health condition, this needs to be your first priority. If having dark circles under your eyes is something that is prolonged and not just the result of overdoing things the night before, consider seeing a doctor to discuss the possible causes. Some things that might be causing your under-eye discoloration include:
  • Allergies – Allergies are a common cause of skin discoloration under the eyes.If an allergy is the root of your problem, treat the allergy, or remove the allergen (namely, the thing to which you're allergic). Seasonal allergy problems such as the hay fever can frequently be effectively treated with over-the-counter and prescription medications. For other allergies, the best course of action is usually avoidance. If your dark circles or puffiness are constant, you may have an undetected food allergy or an allergy to a chemical in your home or workplace. Talk to a dermatologist for help determining what you may be allergic to. People with allergies also tend again to be deficient in B6, folic acid, and B12 on occasion. Taking a multivitamin, if you don't already, may help with your allergies as well as black circles.
  • Gluten intolerance – Another common allergy that causes dark circles is gluten intolerance, which is an allergy to wheat flour in particular. More severely, you could have celiac disease. To test for celiac disease, have blood tests performed by your doctor. It's important to remember, however, that you can be gluten intolerant, and not have celiac disease.
  • Build-up of inadequate sleep – If you've been under a lot of stress, or you have insomnia or sleep apnea, your skin will reflect your lack of sleep by looking poor or discolored.
  • Nasal congestion – a blocked nose can result in dark circles under your eyes because the veins that drain from your eyes to your nose are darkened and dilated.
  • Pigmentation irregularities – These can cause darker circles under the eyes.
  • Sun exposure – This can increase melanin production.
  • Thinning from age – Aging thins the skin, making veins and vessels more obvious as your fat and collagen depletes over time.
  • Lifestyle factors – Poor nutrition, excess alcohol consumption, too many caffeinated drinks, cigarette smoking, and lack of exercise can all contribute to under-eye discoloration. Consider seeing a nutritionist or dietician if you're concerned about dietary issues.
  • Heredity – Establish whether or not this condition runs in your family, as under-eye dark circles are believed to frequently be hereditary. This doesn’t mean that you can’t do anything about the conditions, but you should be prepared for minimal success when trying to get rid of them.
  • Your facial features – Dark circles may be as simple as shadows being thrown by your own features. There isn't much you can do change this other than careful use of cosmetics.
2. Choose a remedy. There are various remedies available. Not all of them will work, or even be appealing to you, but it's important that you try what you think applies to your situation. It might be most helpful to work through various remedies and combine or discard what does and does not work for you.

3. Try a natural remedy. A natural remedy is simply one from household or garden items that have served other people well in the past.
  • Slice cucumber into thick slices. Cucumber slices have long been used to reduce puffiness and refresh the appearance of skin around the eyes, providing a fast "pick-me-up" for tired and puffy eyes. Place a slice over each eye, extending over the darkened area. Do this daily, coupled with lying down for 10-15 minutes. Keep your eyes closed.
  • Apply cool tea bags or an ice cube wrapped in soft cloth to your eyes daily. The tannin in tea bags reduces swelling and discoloration. Lie down, preferably in the morning, and leave the fresh, cool, damp, caffeinated tea bags (you can refrigerate them overnight so they’ll be ready) over your eyes for about 10-15 minutes. Keep your eyes closed.
  • Pour a saline solution (2 cups water with a 1/4 teaspoon of sea salt and/or a half tea-spoon of baking soda) in one of your nostrils with your head tilted to the side so that the water comes out the other nostril. It's best used when you're experiencing nasal congestion.
  • Use a potato. Place one uncooked potato into a liquidizer and liquidize the whole potato. Scoop out and place the pureed potato on your closed eyes .Keep it there for 30 minutes, lying on your back, then wash it off with warm water. This method works well for some people.
4. Use a frozen spoon. Put a spoon in the freezer for 10-15 minutes. Take it out and cover the circles with it. Hold it there until the spoon is warm again.

5. Get your beauty sleep. Get plenty of sleep nightly. It’s not entirely clear why inadequate sleep results in dark circles under the eyes, but lack of sleep tends to cause the skin to become paler (thus increasing the appearance of darkness under the eyes), and reduces circulation. It’s also believed that too little time lying down is a cause in itself.
  • Determine how much sleep you need (it’s usually 7-9 hours per night, but varies for different people at different times throughout their lives). Try to get that amount regularly for a couple of weeks to see if that helps.
  • Alcohol and drugs can adversely affect the quality of your sleep; abstain from these products or use only in moderation for best results.
  • Get adequate vitamins that assist sleep. A lack of sleep, coupled with poor vitamin absorption tends to reduce adrenal function. The less adrenal function you have, the less B6 you tend to absorb. The less B6 you absorb, the less well your adrenal glands function, and you end up in a vicious circle. Sleep, regular vitamins (where needed), and good calcium/magnesium support in the form of eating a lot of greens (which are higher in calcium and magnesium than dairy products are), or a good mineral supplement restores adrenal function.
  • Reduce your stress to help you to sleep more.

6. Eat well. Eat a healthy, balanced diet, take vitamins, and drink plenty of water. A whole host of cosmetic problems can be attributed to vitamin deficiencies. Dark circles and puffiness are often attributed to lack of vitamin K or inadequate antioxidants. Also, a deficiency in B12 (usually anemia-related) can result in dark circles.
  • Eat plenty of fruits and vegetables—especially cabbage, spinach, and other leafy green vegetables—and take a daily vitamin supplement if necessary. Get adequate fluids to improve circulation.
  • Reduce salt intake. Excess salt causes the body to retain water in unusual places, and this can result in puffiness under the eyes. Too much salt can also impair your circulation, and cause the blood vessels under the skin to appear bluer. 


7. Use cosmetic solutions. There are a number of ways to cover up dark circles under eyes using cosmetics. It's important to test the cosmetics for allergic reactions before using them if you haven't already done so: try a skin patch test first. Cease using anything that irritates your skin, causes rashes, or makes your eyes sore or watery.
  • Apply an eye cream containing vitamin K and retinol. Dark circles may be caused by a deficiency of vitamin K. Regardless of the cause, however, skin creams containing these two ingredients reduce puffiness and discoloration significantly in many people. Long-term daily use seems to have the greatest effect.
  • Use an under-eye cream. Use a concealer that will camouflage the dark under-eye circles. It's important to use a concealer that matches your undertone (namely, yellow, peach (for bluish circles), tan, light brown, etc.) After applying the concealer, set it with a light dusting of translucent powder.
  • Treat your skin while you sleep. There are overnight facial masques that may help reduce the appearance of puffiness or discoloration, or you can make your own. And try this simple remedy: just before going to bed, take a piece of cloth and wet it a little with cold water. Squeeze out any excess water and place it over your eyes as you sleep.
8. Focus directly on the under-eye skin. Keep in mind that any direct contact with your under-eye skin must be gentle, as this is the most delicate skin on your body.
  • Try to relax the space. Wet a cotton swab, then freeze it a short time. Then, gently wipe under your eyes in the areas where the circles are occurring. When wiping, close your eyes and try not to flinch.
  • Avoid rubbing your eyes. Usually rubbing of the eyes is brought on by allergies, but not always. It can also be an anxious habit or a reflex action. Regardless of the reason, it's best to stop doing it because the rubbing irritates the skin and can break the tiny capillaries underneath, causing both puffiness and discoloration.
  • Wear dark sunglasses to protect your skin from melanin changes. 
  •  Examine your smoking habit and decide to quit. Smoking causes vascular (blood vessel) problems that can not only threaten your life but also make your blood vessels appear more prominent and bluer.
  • Relax more. Relaxing might help remove sources of stress and anxiety that are preventing you from sleeping, eating, and resting properly. In turn, relaxing enough will help your eye skin to improve as you feel less stressed and more at ease. Skin tends to reflect a whole host of emotional and physical ailments, so don't dismiss the need to relax lightly.

Source: wikihow

How to wash your face ... properly

Washing your face may appear to be the simplest and least talked about topic on earth, but if done properly, it can promote a healthy glow. A face speaks volumes about one's self image and a well looked after face can attract attention and foster confidence in a person. Therefore, cleansing your face properly is basic to a good body care routine. A good face cream (like an oil-free acne wash soap), can really help your face and clean out your pores.

Steps

  1. Tie your hair back from your face. If you have bangs wear a headband or use a hair clip. Make sure you can see and access your entire face, including your ears and neck.
  2. Wash your hands with an antibacterial soap to clean them.
  3. Wet your face with warm water or steam to open your pores.
  4. Put a small amount of face cleanser on your hands, about the size of a nickel. Rub some on your wet hands. Use a product that is gentle enough for your skin. Something too strong will just dry the skin out and stimulate the oil glands to produce more oil. You are trying to remove oil and retain moisture at the same time. Please do not use soap.. It is too strong, and can't be rinsed easily.
  5. Work up a good lather by rubbing both hands together and applying it on your face.
  6. Using your fingertips, massage the cleanser all over your face removing any dirt and oil. Take 30 seconds or so, concentrating on first the hairline, then paying special attention to the "T-zone"; forehead, nose, nostril area, then around the mouth and chin, then cheeks. Cleanse the neck using upward strokes. You have oil glands behind your ears, so don't neglect that area. It's messy, but do it anyway. When you're 50, you will be glad you went to the trouble to help your mature skin look its best.
  7. Rinse your face and neck with clear, tepid water. If it is too cold, it could break capillaries.
  8. Pat your face dry with a clean and soft, absorbent towel; linen is a good choice. Make sure you pat it dry gently. Always treat your face with respect.
  9. If you have large pores, a toner, or astringent, is a good idea to help tighten the pores. It will also clean away the last of the cleanser.
  10. Moisturizer is a very good thing. You have just washed off dirt and oil, and a moisturizer will help keep the water in the surface cells, which promotes a more youthful look. Plus it feels great!
  11. Don't forget eye cream. Use one that says it is for eyes only; otherwise it won't be rich enough. The area around your eyes has no sweat or oil glands, and must be treated differently than other skin.
  12. Check your face everyday and night to see if your treatment is working, if it is not see a doctor and get a facial cream to see better results.

Tips

  • Use grapes as a facial cleanser. Search google for "juice grape facial" for details on this natural home remedy. But don't go crazy with food facial remedies.
  • Use a soap that suits your skin type: oily, normal or dry.
  • If soap gets into your eyes, immediately rinse your eyes with water.
  • Washing your face twice a day should be enough. Washing too much will irritate and dry out your skin more, even if you use lotion to moisturize.
  • If your skin is too dry after washing, use water only and pat dry, or apply a moisturizing lotion afterward. Make sure the moisturizer is oil free or it may cause acne.
  • Wash your face twice if you have been wearing makeup. The first wash removes the makeup and the second cleanses the skin. Or you can use makeup removing towlettes instead of the first wash.
  • Talk to your doctor about possible dermatological issues if you have chronic skin problems. They may very well stem from things you put on your skin: like soap!
  • For some people, washing their face with soap can dry their skin out. If you are one of those people, try using a gentle face-wash.
  • Don't scrub your face too hard, it'll do more harm than good.
  • If you have flaky skin, try using a face brush instead of your hands. It gently exfoliates your skin and improves circulation.
  • Warm water opens up your pores and cold water closes them. Make sure you rinse your face with warm water before using cleaning products, and cold water after.
  • Use a mask and exfoliant once a week to get rid of dead skin and deep oil and dirt.
  • Steaming your pores before hand is good. Let a pot of water boil and hold your head over it for 5-10 minutes to open pores so the cleanser gets deep down to wash away hidden toxins.
  • If you have acne, instead of closing your pores with cold water when you rinse, use warm water and apply an acne cream immediately after washing so that your pores absorb the product. Benzol peroxide and salycic acid are good acne fighting ingredients.

How to Get Rid of Dandruff (Natural Methods)

Dandruff is a common, albeit complex, skin problem resulting in the excessive flaking of dry, white skin from the scalp. The causes are myriad (see Causes to the left): dry skin, oily skin, overuse of styling products, poor diet, stress, excessive shampooing, a fat-eating yeast fungus called malassezia, more serious skin conditions, and any combination of the above can all contribute to your dandruff problem. But just as diverse as the causes of dandruff are, so are the treatments; there are an abundance of trusted self-care options for getting rid of your dandruff, the most common and effective of which we offer to you here.

Causes of Dandruff

The causes of dandruff can be divided into internal and external factors. The following are some of the most common:
  1. Poor health, hygiene, and/or nutrition.
  2. Emotional stress, anxiety, and/or exhaustion.
  3. Allergies.
  4. Hereditary predisposition.
  5. Infrequent and/or inadequate washing and rinsing of scalp and hair.
  6. Dry heat and/or cold weather.
  7. Improper and/or excessive use of harsh hair products (hair spray, gels and creams, dyes).
  8. Excessive use of hair dryers and curling irons.
  9. Skin conditions such as eczema, psoriasis, seborrheic dermatitis, or head lice. 

Dandruff Control

Use commercial dandruff shampoos to get rid of your dandruff. A good anti-dandruff shampoo should contain salicylic acid, zinc pryithione, selenium sulfide, coal tar, or ketoconazole, all of which treat irritated skin cells. Head & Shoulders, Neutrogena, Pantene Pro-V, Pert Plus, Selsun Blue, Nizoral are all popular and effective brands of dandruff-formula shampoos. If you're not sure which product to try first, ask a professional, like your hair stylist or dermatologist. If you sucessfully get rid of your dandruff and choose to go back to a regular-formula shampoo and conditioner, use smaller amounts and make sure to rinse thoroughly to avoid further scalp irritation from over-washing.
Change your styling regimine to get rid of dandruff. Compound build-up from styling products (hair gels, creams, waxes, dyes) and heat and perspiration from hair dryers and irons can cause the scalp irritation and build-up that contributes to dry or oily scalps. To get rid of (or prevent) dandruff be gentle to your hair and scalp by reducing the amount of product you use in your hair, looking for products containing natural ingredients instead of harsh chemicals, and air-drying or towel-drying your hair.
Treat a dry scalp with moisturizing oils and lotions to get rid of dandruff. An invigorating scalp scrub or oil (try something with peppermint in it) can help to heal dry and flaky skin, as well as improve circulation -- another key factor in the presence of dandruff. Other ways to improve circulation to and treat an irritated scalp include alternating rinses under cold and warm water, exercising in the fresh air and sunshine (use sunscreen), and brushing or massaging your scalp before shampooing.
A healthy diet can prevent and get rid of dandruff. Excessive intake of fats, oils, starches, sugars can create the imbalances and nutritional deficiencies that cause an unhealthy scalp and, in turn, dandruff. B Vitamins (especially B6), Vitamin A, healthy fats found in nuts and flax, Garlic, and oil of oregano are all feasible dandruff-fighting dietary supplements. Food allergies can also be behind your dandruff; common allergies include chocolate, nuts, and shellfish.
Stress and anxiety can contribute to dandruff. Emotional, mental, and physical stress play a huge factor in your overall health, dandruff and scalp included. Lack of sleep and rest, stress and worry about your work and/or personal life, illness, and fluctuating hormones can all contribute to your dandruff problem. Just because something bigger doesn't seem directly connected to the state of your scalp doesn't mean you can discount in your dandruff treatment plan. Be aware of your mental and emotional state of health, and be willing take steps to improve problems there in order to get rid of physcial problems like dandruff.

Back To Basics

Seems everyone is going back to basics.  Instead of treatments and cures that use chemicals we are taking the time to look into safe and natural alternatives.  We love the natural alternatives to better health, weight loss, skin and hair care.  This time of year as the weather gets colder, some of us will suffer from dry skin and dry hair.  Natural home remedies are once again becoming as popular as they were years ago with our parents and grandparents.  A favorite for anyone suffering from dandruff is a dandruff home remedy.  If you have a problem with dandruff, try these safe and natural home remedies.

A Dandruff Home Remedy from India

The ingredients you will need are curd, honey and lemon.  Use two tablespoons of curd and mix with three drops of honey and three drops of lemon juice.  Mix together and apply to the scalp, leave on for fifteen minutes, then scrub for fifteen minutes.

Try Coconut Oil For A Dandruff Home Remedy

The best place of buy coconut oil is at any natural or health food store like GNC.  Apply the coconut oil to the scalp and scrub away the dead skin with a brush or fingernails.  Next, either hold your head under a faucet of hot water or in the shower under hot water for fifteen minutes.  You will have immediate results that will last up to six months or a year.

A Canadian Answer For A Dandruff Home Remedy

This will work wonders for your dandruff problem.  Apply baby oil to the entire head in the evening, wrap your head with a towel and leave on until morning then shampoo.  Use the baby oil daily until all dandruff is gone.

Another Dandruff Home Remedy From The States

The answer to this dandruff home remedy is lemon juice.  It's best to use the lemon juice in squeeze bottles since it's easier to control.  Stand over either your kitchen or bathroom sink and squirt the lemon juice all over your head and massage.  Leave on for about fifteen minutes, then wash your hair.  It usually takes no more than two treatments for the dandruff itch to disappear.  This is just a temporary cure.  Repeat as needed should the dandruff come back.

A Dandruff Home Remedy From The Kitchen

Check your kitchen cupboard for olive oil and almond oil.  If you don't have either one, you can usually buy them at health food or vitamin stores.  Mix the two together and apply to scalp and leave on for five minutes.  Once it starts to tingle rinse and shampoo.

A Dandruff Home Remedy From The Barber Shop

Here's an old dandruff home remedy from a retired barber.  Add two crushed aspirins to your shampoo when you wash your hair.  Leave the mixture on for two minutes then rinse and wash again.  This remedy usually works after one treatment.

For a quick fix try aloe vera gel 10-15 minutes before you wash your hair.  Leave it on for about 10 minutes then shampoo your hair.  Use this on a daily basis to keep dandruff away.  On a regular basis try crushing about 10-20 aspirin and mix with liquid shampoo.  Use this dandruff home remedy on a daily basis.  Soak Fenugreek seeds (purchased from a health food store) overnight in water.  In the morning when the seeds are soft, grind them into a paste and apply to the scalp.  Leave on for half an hour rinse then shampoo.

Something most people have in their kitchen are thyme leaves.  Boil about 4 to 5 leaves in two cups of water for ten minutes.  After the mixture cools apply to your scalp and leave on for half an hour then rinse and shampoo.  Also, you can make a tea of apple sage and rosemary tea then apply to scalp leave on for approximately 10-15 minutes rinse then shampoo.

Aloe vera


I have returned with a new post about "aloe vera". Yes. I find this plant miraculous. So if you want a clean skin do not hesitate to try aloe vera products. I assure you will not regret it!

What is Aloe Vera?
  
Aloe Vera is a species of Aloe, native to northern Africa. It is a stemless or very short-stemmed succulent plant growing to 80-100 cm tall, spreading by offsets and root sprouts. The leaves are lanceolate, thick and fleshy, green to grey-green, with a serrated margin. The flowers are produced on a spike up to 90 cm tall, each flower pendulous, with a yellow tubular corolla 2 to 3 cm long.
Aloe Vera has long been a popular houseplant. Often called the 'miracle plant' or the 'natural healer', Aloe Vera is a plant of many surprises. It flourishes in warm and dry climates, and to many people it looks like a cactus with fleshy thorny leaves. In fact it is a member of the Lily family, staying moist where other plants wither and die by closing its pores to prevent moisture loss.
There are around 400 species of Aloe, but it is the Aloe Barbadensis Miller (Aloe Vera or "true aloe") plant which has been of most use to mankind because of the medicinal properties it displays.

The Aloe Vera Plant
 
Although there are many Aloe's the term Aloe Vera ("true Aloe") refers to the Aloe Barbadensis Miller. Fully grown the plant stands 60 to 90 cm high, and a mature leaf is 7 to 10 cm across at the base, weighing 1.5 to 2 kg.
The lower leaf of the plant is used for medicinal purpose. If the lower leaf is sliced open, the gel obtained can be applied on the affected area of the skin. Leaves and seeds are the two edible parts of Aloe Vera.
The Aloe leaf structure is made up of four layers:
Rind - the outer protective layer;
Sap - a layer of bitter fluid which helps protect the plant from animals;
Mucilage Gel - the inner part of the leaf that is filleted out to make Aloe Vera gel.
Aloe Vera (inner gel) contains the 8 essential Amino Acids that the human body needs but cannot manufacture.
Aloe Vera has a bitter taste which can be unpleasant in the raw state. It is possible to get used to the taste of plain Aloe Vera gel, but if you can't the addition of some fruit juice helps to make it more palatable.
There is much confusion between Aloe Vera Gel and Aloe Vera Juice with the two often being thought synonymous. The term Gel refers to the inner leaf only, whereas Juice refers to "Aloe Latex" a bitter substance found just under the skin of the leaf.
Leading authorities on Aloe Vera maintain that only Aloe Vera gel as fresh as preservation allows from the inner leaf has any remarkable properties.

Aloe Vera used Throughout History
 
Aloe Vera has been found described in writings in many different cultures and as far back as the Greek, Egyptians, and Roman eras. References have also been found in writings from the Indian and Chinese early cultures. Ancient records show that the benefits of Aloe Vera have been known for centuries, with its therapeutic advantages and healing properties surviving for over 4000 years. The earliest record of Aloe Vera is on a Sumerian tablet dating from 2100 BC.
Its antiquity was first discovered in 1862 in an Egyptian papyrus dated 1550 BC. Egyptian Queens associated its use with their physical beauty.
It was used to great effect by Greek and Roman physicians. Researchers have found that both the ancient Chinese and Indian used Aloe Vera.
In the Phillipines it is used with milk for kidney infections.
Aloes are referred to in the Bible, and legend suggests that Alexander the Great conquered the island of Socotra in the Indian Ocean to secure supplies of Aloes to treat the battle wounds of his soldiers.
Today in Japan Aloe Vera is commonly used as an ingredient in commercially available yogurt. There are also many companies which produce Aloe Vera beverages.
People in Tamil Nadu, a state of India, often prepare a curry using Aloe Vera which is taken along with Indian bread (nan bread) or rice.

Uses and Home Remedies using Aloe Vera
 
Aloe gel has been used for topical treatment for minor wounds and burns and skin irritations for centuries. Aloe Vera used to be known as the "burn plant'. It is no longer necessary to keep an Aloe Vera plant handy for when you catch your hand on the oven door, these days Aloe Vera Gel comes in handy tubes.
A two year trial is underway at the Neath, Morriston and Singleton hospitals in Swansea for use of Aloe Vera in treating Irritable Bowel Syndrome (IBS). A clinical trial involving 44 patients suffering from Ulcerative Colitis has been completed at the Royal London Hospital and the John Radcliffe Hospital in Oxford. The trial was completed in January 2004 and an improvement found in 38% of Patients given Aloe Vera gel as opposed to 8% given a placebo.
One of the home remedies for asthma was to boil some Aloe Vera leaves in a pan of water and breathe in the vapor.
Others have reported benefits of Aloe Vera in treating Eczema and Psoriarsis, and a product called Aloe Propolis Creme is favoured by many for these conditions.
For pharmaceutical use as a laxative, the aloe juice is taken from the tubules just beneath the outer skin of the leaves. It's a bitter yellow and dried to become aloe granules that are dark brown in color.
Made into a beverage and taken internally, it has been used to help many other conditions. Some of them are constipation, ulcers, diabetes, headaches, arthritis, and coughs. Taking aloe internally does have side effects, which can include pain, electrolyte imbalances, and diarrhea.
It has been determined that it can also help with treating minor vaginal irritations.
Aloe Vera is best used when used fresh from the plant. It doesn't store well but can be bought as a preserved product. Aloe Vera can be used topically as well as taken internally. It has been used for mouth sores, what we call stomach sores, or cold sores.
Aloe Vera has been especially helpful of patients with severe and various skin diseases. It acts as a rejuvenating action. It acts as a moisturizer and hydrates the skin. After being absorbed into the skin, it stimulates the fibroblasts cells and causes them to regenerate themselves faster. It's the cells that that produce the collagen and elastin so the skin will get smoother and look younger.
Because Aloe Vera is natural, it works gently within the intestinal tract to help break down food residues that have become impacted and help clean out the bowel. When the bowel is cleaned out, it greatly reduces bloating, discomfort, and helps ease stress, which only leads to more attacks of irritable bowel syndrome.


Makeup and Eye Shadow Tips to Bring Out Your Eye Color!


Many women want to highlight the color of their eyes and just don't know how to do it. The truth is that many times finding the right shade of makeup can make all of the difference. Brown eyes, blue eyes, green eyes, or hazel eyes, they all have makeup styles that can make those eyes really "pop" out.

Blue Eyes
 
If you have blue eyes there are several shadow shades that will work for you. Shades in the brown, rose and violet families work best generally. They will contrast with the cool tone of your blue eyes and make them stand out. It is also important to use shades that are darker in tone than that of your natural eye color. Try rich browns, golds, warm taupes, soft peaches, lavender, lilac and fuchsia. A common mistake is using blue shadow that is the same or very close to the natural eye color. This can make your eyes appear dull. To get a smoky effect mix your darker shadow with a little bit of black.
For eyeliner, go with a brown shade. Traditional black eyeliner will take away from your eyes. A dark or medium brown eyeliner will work better for blue eyes. Also, you might choose to use a darker shade of eye shadow as your liner instead of a liquid or pencil liner. This will give you a more "smudged" look. For mascara, use brown or brown/black mascara. The brown shade will open and brighten your eyes without drawing attention away from your beautiful color. If you can get away with black mascara, use it sparingly.


 Green Eyes

Violet and plum eye shadow shades are best for green eyes. Warmer colors like deep purples, mauves, lilacs, and medium pinks are good choices. Browns will also look nice with green eyes. Try bronzes, golds, coppers, deep greens, peaches and apricots. Avoid cooler colors like silvers, blues, whites and pastels. These can give you a washed out look. Use lighter colors to highlight the brow bone (peach, taupe, and apricot). Darker shades should go on the crease of the eye (deep brown, deep purple, deep green) and medium shades are to be applied to the eyelid (copper, lilac, mauve). Softly blend the colors together to create a finished and smoky look.
For eyeliner, try a dark brown shade. Black eyeliner will be too harsh. For special occasions you could get a little fancy with gold or bronze liner. Your mascara should be brownish black also. Use black mascara sparingly.


Brown Eyes
 
Brown eyes are the easiest to compliment! This eye color can get away with all of those bright colors without look tacky. You can go with greens, golds, browns, pinks, blues, grays and purples. Earthy colors look great with brown eyes. Any shade of blue is going to look best with brown eyes. Cooler tones contrast well and make the eyes stand out. Choose a shade lighter than your eye color for a more natural and clean look. If you choose a shade dark you will appear more dramatic and sexy.
Black eyeliner will work nicely with brown eyes. It will give you a dramatic look and really make the eyes pop. Choose a darker liner in a shade that matches your eye shadow for a more subtle look. For example, a navy liner will compliment blue eye shadows. To make the eyes really stand out you can use a white liner on the inside of your bottom lid and a darker shade on the top lid. This can give you an "ethereal" look. This trick will also make small eyes appear bigger. Use some black mascara to open and brighten the eyes while highlighting their warm and rich tone.


Hazel Eyes


Shades of pale pink, light purple and sheer blush look great with hazel eyes. Pair pink with purple shades and show off your girly side. Apply a deep, dark shade to your crease. Use a slightly upward and outward motion. Use some shimmer on your lids for an "everyday" appearance. This will make your whole look glow. Hazel eyes stand out with deep greens, lavenders and shades with soft yellow undertones. To bring out the gold in your eyes, choose golden based eye shadows. To bring out the green specks in your eyes choose a brighter green shade like emerald and apply in three different intensities. To bring out the blue specks in your eyes go with purple in three different shades. To highlight the brown base of your hazel eyes stick with natural shades of brown. This will give you that "doe-like" appearance.
For a stunning look pair all of these eye shadow choices with black eyeliner and mascara. To bring out the green and blue specks with a more natural look, go with soft natural shades paired with dark green or blue liner and black mascara.


General Tips
For blush and lip color choose neutral shades. This will keep the focus on your eyes. With the more natural look you will also look clean and beautiful.
Choose shadow colors that work with your skin tone.
Before applying any eye makeup, make sure your eyes are feeling and looking their best. Apply a cooling treatment and/or some eye drops to reduce redness if needed. Then give your eyes a little break before "glamming it up." To reduce puffiness try slices of cucumber, a lavender mask, or cotton balls soaked in cold water.
Avoid using colors that are the same as your eye color for the most part.
The best eye shadow combination will be two or three shades that blend well together.
For a dramatic look, smudge your eyeliner the first time you apply and then put on another layer.
Apply moisturizer to your eyelids before putting on any shadow. This will prevent any caking in the creases after hours of wear.
The "smoky eye" works with any eye color.
Apply a dab or foundation to your eyelid and brow area. This will keep the eye makeup intact longer.
Remember, some colors that are supposed to look great on you may not. You need to experiment to find what works for you. These tips are just a little push in the right direction.


Source: http://www.associatedcontent.com

How to Remove Split Ends with an Avocado Treatment

Are you a busy bee? Have no time to hit the salon for a trim, but have ridiculously noticeable split ends? If so, this all-natural solution is for you!


Slightly dampen hair with a spray bottle.


Peel two avocados and remove the pits.


Place avocados in a bowl and mush them up by smashing with a fork.


Scoop a handful of avocado in you hand and rub it from top to bottom, be sure to use more at the areas with split ends;by putting it around your scalp it will prevent split ends in the future.


Pull up hair in shower cap or paper baggy.


After 15-25 minutes take a quick shower, remove avocado from hair.


Shampoo and condition.

Brush out hair to reveal beautiful, silky hair.